Are you an artist looking for a smooth and polished look to your drawings? If so, then you may want to try using a blending stump. A blending stump is helpful for artists who wish to blend their drawings or shading. There are many different ways to use a blending stump, and this guide will teach you the basics and some clever ways.
Table of Contents
What is a Blending Stump?
A blending stump is a white cylindrical drawing tool made of tightly rolled paper used to blend pencil or charcoal strokes on paper. They are pointy on both sides and used in the drawing for gradation and value creation. They are usually made of paper but are also available in leather.
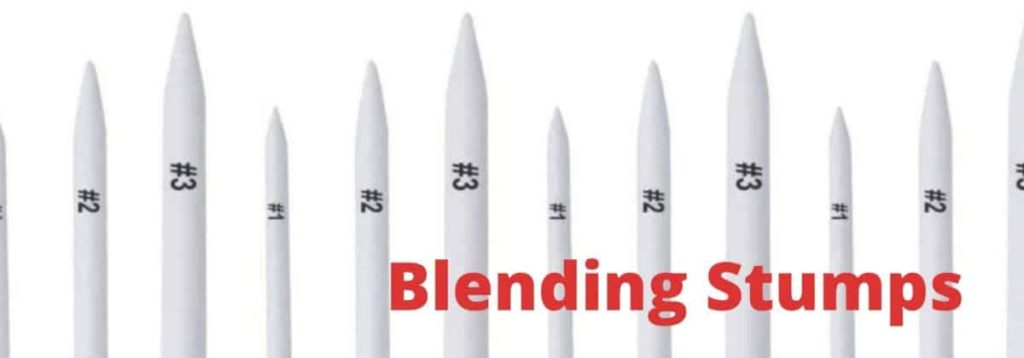
Blending stumps are available in various sizes, from very thin to thick. The stump’s size will determine the pressure you can apply and achieve the blending level. The pencil stumps are serially numbered based on their thickness, starting from 1 to 8.
Previously when you want to blend your graphite or charcoal drawing, you may have used your finger or paper napkin, earbuds, or old clothes. This drawing tool replaces it. It is incredibly comfortable and is like how you use a pencil, and you can blend with this pencil stump.
When selecting a blending stump, choosing one slightly wider than the area you plan to blend is essential. This will allow you to blend even without leaving any hard edges.
If you want to blend a small area, you can use the tip, and if you’re going to blend a larger area, you can slightly slant the stump and use it to cover a wider area. It creates several textures, especially hair, skin, etc.

How to use Blending Stump?
Using a Blending Stump is as simple as using a Pencil; hence it is also called a Pencil stump. You need to hold the blending stump just like a pencil, depending on the area of your Artwork you want to blend.
You can hold the tip slightly tilted and blend in a broader area.
Blending stumps are especially useful for smooth transitions between different values (lights and darks). To use a blending stump, the artist first applies a light layer of pencil strokes to their drawing. Then, they rub the stump onto the drawing in a circular motion until the strokes blend.
A blending stump can help create a highly polished and realistic drawing when used correctly. It is generally used to create different textures, shades, and values for your drawing. They can also create texture and add depth to a drawing.
Use Different Sizes of Blending Stumps
You can also use different sizes of the blending stumps depending on the area you want to blend.
- Higher-numbered pencil stumps can cover a wider area and save time but lose precision.
- If you want to blend a small area, e.g., if you’re going to draw an eye and blend the iris, you can use a blending stump with the number 1, which can be precise.
- If you want to blend a forehead on a portrait with a broader area, you can use a pencil stump with the number 6, which can be productive.
Use Different Pencil Grades for Different Shades
It would be best if you used appropriate pencil grades to get the desired texture, shade, and value results.
For example, you are drawing a portrait and want to look realistic. It would be best to use
an HB pencil for the initial sketching. For adding different values, i.e., lights, darks, and mid-tones in the portrait, you can use 2B, 4B, and 6B pencils.

And for the final touch, you can use 8B or 9B pencils to add texture and depth.
When working with pencils, the B grade indicates the darkness and intensity of the lead, with lower numbers indicating lighter shades and higher numbers indicating darker shades. For highlighting specific areas in a portrait, a 2H pencil is recommended. Different pencil grades and paper stumps can help achieve a more realistic shading effect.
Use a clean paper stump to blend so that the lines visible on the paper blend and create an even shade. Use different paper stumps to create different textures on the paper. The harder the paper stump, the smoother the texture it creates, and vice versa.
How Much Pressure should be Applied When Using Pencil Stump?
You should not put too much pressure on the Pencil stump and damage the paper’s surface or the stump itself. It would help if you used light pressure and shade evenly to the extent possible without gaps or lines visible on the paper.
It would be best to use blending stumps as a supplementary or value addition for the shading. Also, when using a blending stump, avoid putting pressure on the tip, or use the sides lightly and try to even out the lines.
Blending Stumps to be Used for Different Textures
One of the best uses of blending stumps is for creating different textures.
To achieve a skin texture in your drawing, start by lightly drawing circular lines within the desired area on the paper. Afterward, use a blending stump to blend the lines in a circular motion for a seamless finish. You will see that the lines will start to merge, and the texture will become more evident.
You can also use this technique to create fabric textures like denim or woolen clothes. This is because when you use a blending stump, it blends the pencil strokes, giving it a more textured look. You can also use a technique called hatching to create different textures. In hatching, you draw parallel lines close to each other and then use a blending stump to blend the lines. This will give your drawing a more textured look.
How do you Sharpen the Blending Stump?
As you keep using the pencil stump, the tip of the stump will become blunt. When this happens, you must sharpen the stump to use it again. These stumps are made of soft rolled papers and must be sharpened carefully.
There are two ways to sharpen a blending stump.
Sharpen Using Sand Paper
The first way is to use sandpaper to sharpen the stump. To sharpen the stump, you must get a piece of fine-grit sandpaper. You can find this at any hardware store. Then, hold the sandpaper in one hand and the blending stump in the other hand. Rub the stump against the sandpaper in a circular motion until the tip of the stump is sharpened. Keep rotating the blending stump continuously and rubbing simultaneously to the extent you want to sharpen it.
Sharpen Using Knife
The second way is to use a sharp knife to shave off the tip of the stump. You will need a craft knife and a cutting board to do this. Place the stump on the cutting board and carefully shave off the tip of the stump with the knife.
If the Pencil stumps are too blunt and you need to carve them. After you sharpen it using a craft knife, it is better to rub it on the Sandpaper to smoothen the surface.
Be careful not to cut yourself when you are doing this. Always keep your drawing tools sharpened and ready to use. This will help you get the best results from your drawings.
How do you Clean Blending Stumps?
Blending stumps become dark at the tip, and the color of the lead gets transferred to the paper. If you use it without cleaning, the pigment stuck on the edges will stick to the surface of your drawing paper and spoil your Artwork.
When this happens, you need to clean the stump. There are two ways to clean a blending stump.
Sandpaper
Use Sandpaper with a Low grit level.
- You need to keep the Sandpaper on the work surface and rub the Blending stump on the Sandpaper till the graphite is removed. Slightly keep rotating in such a way all the stains are removed.
- You can use 100-grit sandpaper to remove the stain of the Graphite or Charcoal. Use a craft knife to remove the rough bits of paper from the stump.
Finally, use a higher grit level of Sandpaper to smoothen the surface.
Kneaded Eraser
This is another method of cleaning Blending Stump. It would be best to mold the kneaded eraser on the edges of the blending stump, twisting and turning them inside many times.
The kneaded eraser will absorb the graphite or charcoal stains onto itself. If you still find the stains, you need to keep repeating them till the stains are removed.
Always keep it clean so it is easy to use next time.
How Much Does Blending Stump Cost?
The cost of a blending stump varies depending on the size and quality of the product. You usually get it as a set, and smaller stumps may cost as little as $1, while more significant, high-quality stumps can cost up to $10. This is just an indicative price, which may differ between the brands and your buying location.
When choosing a blending stump, it is essential to consider the artist’s needs. Those who work with large areas of color will need an enormous stump, while those who work with smaller areas or need more control over the blending process will need a smaller size.
You do not require too many blending stumps at one shot, so use 5 to 10 different sizes and use it. Clean and reuse it to the maximum extent until it gets worn out. Once it is used ultimately, you can go for it again.
Where to Buy Pencil Stumps?
Amazon.com and Blick Art Materials are two popular sources for buying blending stumps. When shopping for a blending stump, it is essential to consider the size and type of stump that will work best for the project.
These stumps are also available in most of the art supply stores in most parts of the world. You can also purchase them online from various retailers.
How to Make a Blending Stump?
Blending stump is an excellent art tool for an Artist. I am unsure if blending stumps are available at all places or if all art lovers know it exists. If you cannot get it or do not feel like spending money on buying it, you can make it yourself home. The process of making a blending stump is quite simple and easy.
Materials required to make a Blending Stump
- Cello Tape
- Sandpaper
- Scissors
- Knife
- Paper
Step 1 – Take a paper of your choice and ensure it is soft.
Step 2 – Cut the paper into a rectangle shape and let the side length be twice the size of the breadth.
Step 3 – Cut the top corner with scissors the size of an isosceles triangle.
Step 4 – Using your thumb and index finger, roll the paper from right to left, starting from the opposite side where you cut the paper.
Step 5 – Try to roll using both hands. Please keep your hands moist so it is easy to roll the paper.
Step 6 – Roll it very tightly so that there is no hole in the center which can affect if you want to blend a small area with precision.
Step 7 – Hold the rolled paper tightly and tape the end of the paper along with the body of the stump you made.
Step 8 – Sharpen the edge of the homemade blending stump, which is not hollow, with a knife.
Step 9 – To smoothen the homemade blending stump, rub the sharpened surface on Sandpaper to make it even.
Step 10 – The homemade blending stump is ready for use, and you can start using it immediately.
Do you Need a Pencil stump?
The answer to this question is both Yes and No. If you are a beginner, it is advisable to use a pencil stump as it will help you create the desired effect with less effort. However, if you are an experienced artist, you may not need it as you would have already mastered the art of blending without any extra tools.
It also depends on the type of Artwork and the expected result. It saves time, and it is a shortcut, especially when you are drawing a larger area.
But nowadays, some people depend too much on this tool as they cannot draw without them.
Can you use Blending Stump with Color Pencils?
Blending stumps are usually used with graphite pencils but can also be used with colored pencils. The stump acts as an eraser, smudging the color pencil strokes and creating a smooth, blended effect.
Using a blending stump with colored pencils, start with light pressure and build up slowly. Otherwise, you may end up with a muddy mess. With some practice, you can create beautiful, seamless blends with your colored pencils.
To blend colors with colored pencils, you must use the layering technique. After layering, try to blend using a pencil stump. After using the pencil stumps, try the darker color pencil again and darken the area to give a more significant effect.
Blending will remove the pigments a little bit, and the value of the original color is lost. Try layering and blending until you get the perfect mix of what you want.
The substitute for blending color pencils is colorless blender pencils. They do not have any pigments but will bind colors and has wax in them. They come with a Prisma color brand.
Alternative for Blending Stump
A good artist rarely uses a blending stump, and they try to create the blend effect with multiple layering of the shades or using their shading techniques.
However, to shorten the time taken for drawing, one can use a blending stump.
What alternatives can you blend if you do not have a blending stump? Let’s see it here.
Paint Brush instead of Blending Stump
You can use a regular paintbrush to create the desired blending effect. A small, soft-bristled brush will work best for this purpose. If you don’t have a small brush, you can trim the bristles of a larger brush to create a smaller one.
To use a paintbrush for blending, start with light pressure and build up slowly. You can create beautiful, seamless blends with your paintbrush with some practice.
When you blend using a paintbrush, the graphite gets filled in between the gaps of the paper fiber, giving a soft effect of the shade you have done. The technique is to layer from lighter pencils like H to darker pencils B, 2B, 4B, and 6B, and blend each time you have completed a layer.
Doing this can give an excellent effect and smoothness to your drawing.
Cotton Swabs as an alternative for Blending Stump
Cotton swabs are soft and absorbent, making them ideal for blending pencil strokes. To use a cotton swab for blending, start with light pressure and build up slowly.
The blending effect will be good, if not significant, and the only disadvantage I see using this tool is the time. You can use this to blend smaller areas; if you want to cover a larger area, you need a better tool.
You may have minor issues if you try to cover and blend larger areas using cotton swabs. Once after completing your blending, if you move away and see, you may find some patches, as there is no uniformity in how you blend.
Cotton swabs are suitable for covering small areas and not for large areas.
Paper Napkin
An alternative method for blending pencil strokes is to use a paper napkin. It can effectively smudge and blend the lines to create the desired effect. Paper napkins are soft and absorbent, making them ideal for blending pencil strokes.
To use a paper napkin for blending, start with light pressure and build up slowly. The blending effect will be good, if not significant.
To use a paper towel for blending, you must first fold the paper napkin in half, then again to another half, and keep folding till you cannot fold further. Using this folded paper napkin, you can blend the pencil shades.
They are a bit sturdy but not as sturdy as blending stumps. One of the advantages is that you can blend narrow and broad areas seamlessly.
Paper
The paper was my first tool to blend my drawings, and that was during my school days. I was unaware of anything else, so I took a piece of paper, folded it in half, and then again into another half, and kept folding till I could not fold further.
After folding the paper into a small enough size, I used this as a blending stump to blend my pencil shades. The effects when shading will be good. But it would help if you were careful not to damage the drawing.
Paper is thicker than paintbrushes, cotton swabs, or paper towels. It can damage the drawing surface when you blend, as the folded paper will have a sharper character.
You should apply the right amount of pressure for blending when using paper.
What is the difference Between Tortillons and Blending Stumps?
Conclusion
A blending stump can be a valuable tool for artists if used correctly and with the right amount of pressure. Using a blending stump to enhance your artistic talent would be best.
I tried to update most of the essential aspects of the blending stick, and in case I missed anything or want to cover something else, I kindly request you to share it in the comment section below.
Happy drawing and Happy blending.