You’re a beginner looking for some pencil drawing inspiration and don’t know where to start. You’ve done it before in school, but now you want to do more than a sketch on the back of your hand or copy someone’s work from Pinterest. You want to be able to draw whatever comes into your head and make it look real, even if it’s just a little bit.
Here are ten pencil drawing techniques for beginners to help you get started.
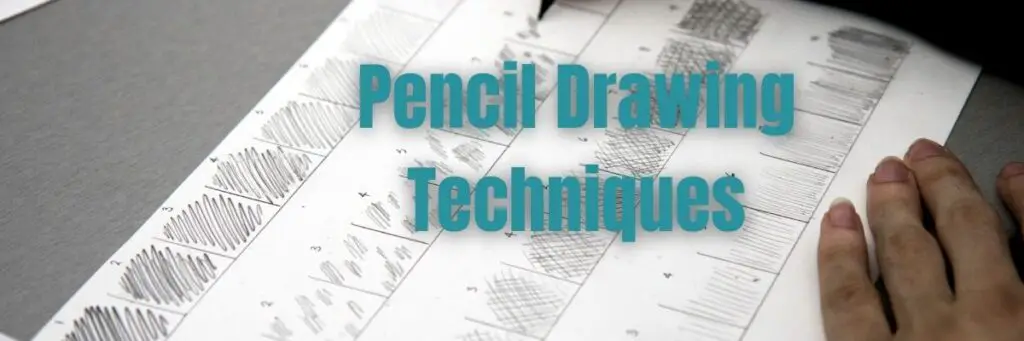
Table of Contents
The Basics of Pencil Drawing
Pencil drawing is a great way to ease into the world of art. No other medium is as forgiving as pencils when it comes to mistakes. Before starting their journey into pencil drawings, there are some basic pencil drawing techniques that every budding artist should know.
Choosing the Right Pencils
Not all pencils are created equal. There are many pencils on the market designed for different purposes. As a beginner, you’ll want to stick with graphite pencils in a range of hardnesses from 6B to 4H. You can also use mechanical pencils for drawing thin, precise lines.
It will give you an excellent range to work with as you start, and you can always add more specialized pencils to your collection later.
Get the Right Paper
Choosing the right paper is just as important as selecting the perfect pencils. The right paper will be heavyweight and have a smooth, slick surface. It should also be acid-free to prevent your pencils from fading over time.
If you want your drawings to look their best, invest in a good sketchbook or drawing pad designed for graphite pencils.
Blending Stump
A blending stump is a small piece of rolled-up paper useful for smudging and blending your pencil strokes. You can also use your fingers, but a stump gives you more control.
Other Pencil Drawing Tools
In addition to your pencils and paper, there are a few drawing materials that you’ll need to get started.
A kneaded eraser is a tool for lightening areas and removing unwanted lines. A vinyl or gum eraser will come in handy for heavier lifting.
A sharpener will keep your pencils in top condition, and you can use a sanding block to smooth out your paper if it’s too rough.
How to Hold Your Pencil?
One of beginner artists’ most common questions is how to hold their pencils correctly. The answer is that there is no one correct way to do it. Experiment and find what feels comfortable for you.
However, the broader answer will be it depends on what artwork you want to create. If you’re doing more detailed work, you’ll want to hold your pencil closer to the point.
But if you’re going for something looser and more expressive, you can hold it further back.
There is a more elaborate post on how to hold your pencil when drawing, which you can check.
Shading and Blending Techniques
You have all the art supplies and know how to hold your pencil. It’s time to understand drawing techniques. These basic pencil techniques will help you get started.
Shading
Shading adds depth and dimension to your drawings by varying the darkness of your pencil strokes. The closer your strokes are together, the darker they will appear.
You can also use pressure to create different shades. The harder you press, you will create dark lines, and the softer you press, you will create light lines.
Blending
Blending is the process of softening the edges of your pencil strokes by smudging them with a blending stump or finger. This technique helps create shadows and depth.
You may also make a smoother transition between shades by using blending stumps.
The key to successful blending is using light pressure and slowly building up the color.
Hatching and Crosshatching
Hatching is a technique where you draw parallel lines close together to create shadows and depth. The closer your lines are together, the darker the shadow will appear.
You can also put a different pressure level to create different shades of gray. Softer pencil strokes result in lighter shades, while harder strokes create darker ones.
Cross-hatching is similar to hatching, but the lines are drawn at a crosswise angle instead of parallel. Cross hatching technique is often used to create texture and depth.
Stippling
Stippling is a technique in which you use dots to create shadows and depth. The closer your dots are together, the darker the shadow will appear.
You can also use different sizes of dots to create different shades. Smaller dots will create lighter shades, while larger dots will create darker shades.
Layering
Layering is a technique in which you draw over an area multiple times to create shadows and depth. The more layers you add repeatedly, the darker the shadow will appear.
You can also use different pencils or different pressure to create different shades. The softer lead will produce lighter shades, while harder lead will create darker shades.
Scumbling
Scumbling is a technique in which you draw small circles or scribbles over an area to create shadows and depth.
To achieve varying shades, experiment with using alternate pencils or adjusting the amount of pressure applied. The softer lead will produce lighter shades, while harder lead will create darker shades.
Pointillism
Pointillism is a technique in which you use small dots to create shadows and depth. The closer your dots are together, the darker the shadow will appear.
You can also use different sizes of dots to create different shades. Smaller dots will create lighter shades, while larger dots will create darker shades.
So there you have it. These are a few standard shading and blending techniques in Pencil drawing.
Experiment and find what feels comfortable for you.
Texture and Detail in Pencil Drawings
One of the great things about pencil drawings is that you can add a lot of detail and texture to your pictures.
There are several ways to add texture and detail to your drawings. Here are just a few crosshatching, hatching, stippling, pointillism, and stumbling, which we have already seen above.
You can also use different types of pencils to create different textures. A softer lead will create a smoother texture, while a harder lead will create a rougher texture.
You can also use different strokes to create different textures. Short, quick strokes will create a rough texture, while long, slow strokes will create a smooth texture.
There are endless possibilities for adding texture and detail to your pencil drawings.
Adding Texture to Your Drawings
Adding texture to your drawings can pop and give them a three-dimensional look.
You can add textures to your pencil drawing in many ways. You can use pencils of different hardnesses or charcoal for a dark, bold look.
You can also experiment with different strokes, such as short, quick strokes or long, short strokes.
And you can use different tools, such as a toothbrush or Q-tip, to create exciting textures.
Adding Detail to Your Drawings
Adding detail to your drawing can help you create a realistic drawing.
There are many different ways to add detail. You can use a fine-tipped pencil to add small details or a thicker pencil for more extensive details.
You can add detail by hatching, crosshatching, stippling, or using a tool to create small dots.
Adding texture and detail to your pencil drawings can give them more depth and look more realistic.
Using Different Textures
Textures add interest and life to a drawing, making them visually appealing. They also give a three-dimensional look to the image.
Different textures can be created using different strokes, pencils, or tools. You can create a variety of textures by using different strokes, pencils, or tools.
Adding detail to your drawings can also add texture. Experiment with different ways of adding detail, such as hatching, crosshatching, stippling, or using a tool to create small dots.
Final Thoughts
Adding texture and detail to your pencil drawings can give them more depth and look more realistic.
Experiment with different techniques and find the ones that work best for you.
Perspective in Pencil Drawings
Perspective is the way we see objects concerning other things. It is the depth, or three-dimensional quality, of an image.
When we look at an object, we see it in perspective. We see it with other things around it.
For example, when we look at a building, we see it in perspective. We see it in relation to the sky, the ground, and other buildings around it.
If we draw a building, we need to include perspective in our drawing.
There are two main types of perspective: linear perspective and atmospheric perspective.
Linear Perspective
Linear perspective is the way we see objects with other objects. It is the depth, or three-dimensional quality, of an image.
One-point perspective
One-point perspective is the most basic type of perspective. It is used to draw objects facing the viewer head-on and has only one vanishing point.
The easiest way to understand a one-point perspective is to imagine a set of train tracks. The tracks appear to come together in the distance and converge at a single vanishing point on the horizon.
Two-Point Perspective
Two-point perspective is used to draw objects not facing the viewer head-on. It has two vanishing points, one on each side of the horizon.
Imagine standing in the middle of a train track to understand a two-point perspective. The tracks converge at two vanishing points, one on each side of the horizon.
Three-point Perspective
Three-point perspective is used to draw objects not facing the viewer head-on. It has three vanishing points, one on each side of the horizon and one above or below it.
Atmospheric Perspective
Atmospheric perspective is used to draw objects that are far away. It makes distant objects appear blurry and less detailed.
To understand atmospheric perspective, imagine looking at a mountain in the distance. The mountain appears less detailed and blurry because of the atmosphere between you and the mountain.
Adding Perspective to Your Drawings
Adding perspective to your drawings can make them look more realistic and give them more depth.
When adding perspective to your drawings, it is essential to remember the type of perspective you are using.
Creating a Sense of Depth with Shading
Shading is adding shadows to an image to create a sense of depth.
Light and shadow are essential elements of shading. Light creates the highlights, while shadow creates the illusion of depth.
Create Depth with Shading
When you add shading to an image, it creates the illusion of depth.
You can use shading to make an object appear three-dimensional. You can also use it to create the illusion of light and shadow.
You can also use shading to make an object appear closer or farther away.
For example, if you add shading to the top of an object, it will appear closer than if you add shading to the bottom.
The type of shading you use will also affect the illusion of depth.
Figures and Form Shape
The term “form” can refer to the basic shape of an object or the way an object appears in three-dimensional space.
Objects have different types of shapes. The most common type of shape is geometric. Geometric shapes are shapes that have straight lines and angles.
Examples of geometric shapes are squares, rectangles, triangles, and circles.
Non-geometric shapes do not have straight lines or angles.
Some examples of non-geometric shapes are organic shapes and freeform shapes.
As you can see, the shape of an object can affect how it looks.
Understanding figures and forms can help you create more realistic pencil drawings.
Shadowing Techniques
Shading adds shadows to an image to create a sense of depth, distance, and direction.
Light and shadow are essential elements of shading. Light creates the highlights, while shadow creates the illusion of depth.
You can use various shadowing techniques to add shadows to your drawings.
The most common type of shadowing technique is called cross-hatching. Cross hatching is when you draw two sets of parallel lines that cross each other.
You can also use stippling to add shadows to your drawings. Stippling is when you use small dots to create the illusion of shadow.
Rendering Shadows with a Cast Shadow
When an object blocks light, a cast shadow gets created on the object.
Imagine holding a ball in your hand to understand how a cast shadow is created. The ball is blocking the light, casting a shadow on the ground.
The size, shape, and direction of a cast shadow depend on the size, shape, and movement of the object casting the shadow.
You can use a cast shadow to add depth and realism to your drawings.
Using Different Types of Pencils for Varied Effects
The type of pencil you use will affect the appearance of your drawing.
There are two types of pencils: lead and charcoal. Lead pencils are made with graphite, while charcoal pencils are made with soot and carbon.
Lead pencils come in different degrees of hardness, from HB to 9B. If the lead is harder, the lighter the value. If the lead is softer, the darker the value.
Charcoal pencils also come in different degrees of hardness. The harder the charcoal, the more precise the line. The softer the charcoal, the smudgier the line.
Lead Types
Three types of lead pencils are hard, medium, and soft.
Hard lead pencils have a light value and are suitable for drawing details.
Medium lead pencils have a medium value and are ideal for general drawing.
Soft lead pencils have a dark value and are ideal for shading.
Charcoal Types
There are two types of charcoal pencils: willow and compressed.
Willow charcoal is soft and smudgy. It’s suitable for creating broad strokes and for blending.
Compressed charcoal is hard and precise. It’s suitable for detailed drawings and for creating the fine darkest lines.
Hardness
A number indicates the hardness of a pencil. The higher the number, the harder pencil. The lower the number, the softer the lead.
Here is a hardness scale:
- 9H – very hard, light value
- 8H – hard, light value
- 7H – medium-hard, light value
- 6H – medium, light to medium value
- 5H – medium-soft, medium value
- 4H – soft, dark value
- 3H – very soft, dark value
- 2H – extra soft, darkest value
- B – blackest value
Application of Pressure
If you press the pencil harder down on the paper, darker the value. The lighter you press, the lighter the value.
You can use this to create light and dark areas in your drawing.
For example, if you want to draw a tree, you would use light pressure for the leaves and branches and dark pressure for the trunk.
You can also use different types of pressure to create different kinds of lines.
Adding Finishing Touches to Pencil Drawings
Once you have a complete drawing done with a pencil, you can add finishing touches to your pictures.
One way to add finishing touches is to use a putty eraser. An eraser can help you create highlights and create the illusion of light.
You can also use a sharpener to create different types of lines. A sharpener can help you create fuzzy, thin, or thicker lines.
You can also use a pen to add finishing touches to your drawings. A pen can help you create fine details and add depth to your pictures.
You can add a frame or mat when you finish adding finishing touches to your drawings. A-frame or mat can help you protect your pictures and add a decorative touch.
The Importance of Finishing Touches
Adding finishing touches to your drawings can help you create more realistic and aesthetically pleasing pictures.
Finishing touches can also help you express your creativity and add a personal touch to your pictures.
Without finishing touches, your drawings may look flat and unfinished. Adding finishing touches can help you turn a good picture into a great one.
Importance of Fixative to Your Pencil Drawing
Pencil drawings are drawn on paper, an absorbent material that can smudge easily. You should know how to preserve your pencil drawing.
To prevent smudging, you can use a fixative. A fixative is a clear liquid that you apply to your drawing.
Fixative helps to set the pencil lead in place and prevents smudging. It also protects your drawing from damage and fading.
You can buy fixatives at an art supply store or online.
Conclusion
We hope you’ve enjoyed this roundup of pencil drawing techniques for beginners. The next step is to try these techniques and create beautiful pencil drawings.
Remember, practice makes perfect, so don’t be discouraged if your drawings don’t look impressive at first.
Keep practicing, and soon enough, you can create stunning pieces of art with just a pencil and paper.
Happy drawing!