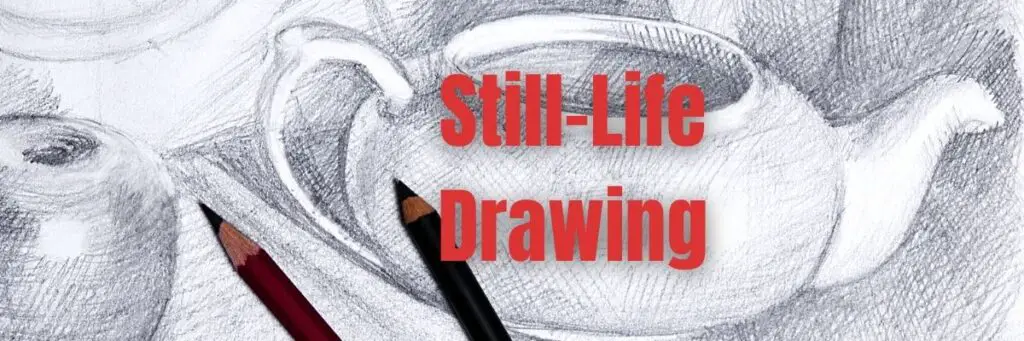
To get better at drawing, one needs to start with the basics. One such essential is learning how to draw still life. A still-life drawing is simply a composition of objects arranged in a static pose.
There are many reasons you might want to practice this type of drawing. The primary reason is that it can help you improve your accuracy and attention to detail.
When drawing objects in a static pose, you have time to examine the intricate details, study the light and shades, their values and contours, and get them perfect.
One common challenge beginners have when drawing still life is correcting the proportions. It can be especially tricky if the objects in your composition are of different sizes and shapes and are at different distances.
It’s essential to take your time and measure the distances between each object to create a balanced and harmonious composition.
Another challenge a budding artist may have is difficulty accurately capturing the objects’ shadows and form. It takes practice, but it’s essential to experiment with different techniques until you find one that works best.
You might want to use different shades of pencils to create variations in basic tones or a blending stump to smoothen the transitions between colors.
Let us understand some aspects of Still Life Drawing now.
Table of Contents
What is a Still Life Drawing?
A still-life drawing is an artwork that depicts still-life objects, in most cases household items or everyday objects from nature.
For many beginner artists, drawing still-life can help them learn basic drawing skills like basic shapes, contour lines, understanding values, shading, etc.
Such a drawing can help the beginner understand which object area is dark and which is illuminated by the light source and the differences in light.
The objects are stationary and are usually small enough to fit on a single sheet of paper. It makes them more accessible than other art forms like figure drawings or landscapes, which require more space.
The finest medium for still-life drawing is charcoal because it is both inexpensive and widely accessible. When using Charcoal as a medium, you will be required to use Charcoal Pencil.
What are the Elements of a Still Life Drawing?
To draw a successful still-life, you must comprehend the fundamentals of composition.
These elements can be divided into primary elements and supporting elements.
The primary elements are those that are essential for creating a successful drawing. They are the objects that make up the still-life composition and usually form the image’s focal point.
The supporting elements are secondary to the primary aspects and enhance or strengthen the overall composition. They might include shadows, highlights, textures, background objects, etc.
Primary Elements- The Objects in the Drawing
The essential elements are those drawn when it comes to still-life drawings. In other words, whether or not your drawing is successful will depend on the objects you decide to include in the composition.
To be recognized as separate from its surroundings, each item must have enough detail and variety in tonal values to easily distinguish it from the background.
It’s also important to consider how each object relates to its background items in contrast and tone. Ensure that the difference between the objects and their backgrounds isn’t too substantial; otherwise, your drawing will lose focus.
When selecting objects for your drawings, keep in mind the following general guidelines:
1) Try using easily recognizable everyday objects.
2) Use life object that has a strong contrast to their surroundings
3) Avoid using shiny objects as these are difficult to draw
4) Use Objects with subtle textures
6) Simple geometric shape objects work best for beginners.
Secondary Elements in Still-life Drawing
Although they are not as crucial as the primary elements in still-life drawings, the secondary elements still contribute to the composition.
These might include things like shadows, highlights, or background items. You can use them to enhance or strengthen your main focal point.
Objects also make good secondary elements because they give more detail and character to your drawings.
- The background is a significant secondary element. Be innovative with your background ideas and create a good sense of depth and space in your drawings.
- Foregrounds are significant secondary elements if they are near any of the objects in the drawing. Foregrounds also help ground your things so that it doesn’t appear to be floating away into the distance.
- Shadows are another good secondary element to add to your still-life drawings. Shadows are created when the light in a scene bounces off an object and falls onto another nearby surface.
- Angles and perspectives add interest to your drawing. For instance, if you angle the objects in your drawing at an angle or slightly tilted perspective might be more interesting than if they were all perfectly upright.
- Proportions also contribute depth to your drawing. It gives a sense of how far away your objects are from one another.
Understanding these secondary elements will allow you to create a more interesting composition as a still-life artist.
How to Draw a Still Life
Choose your objects
It’s important to choose your objects carefully while drawing still-lifes. The things you choose will dictate your picture’s overall feel and composition. So take some time to consider what objects you want to use and ensure they all work well together.
The types of objects – Objects you can use in a still-life drawing are endless, but some popular choices include flowers, fruits, vegetables, commonplace objects, and everyday things like cups and dishes.
Choose your viewpoint – Once you’ve chosen your objects, you must decide. This viewpoint will ensure the alignment of objects and make you decide how you’ll draw them. Where you put your items in the artwork will depend on it. You can position your objects in a frontal, side, or 3/4 view.
How to choose the proper objects – When selecting objects, consider the following:
Are the objects complementary – Try choosing things with assorted shapes, sizes, and colors. It will make for a more exciting and eye-catching composition.
Do the objects have any interesting textures – Texture can add a lot of interest to a drawing, so be sure to choose objects with interesting textures. Check on the drawing surface, which can affect the picture’s texture.
Are the objects symmetrical or asymmetrical – Symmetrical things tend to be more aesthetically pleasing, while asymmetrical objects can create a more dynamic composition. Picking up a complex object with complex shapes will make your drawing process difficult.
Arrange your objects
Correctly placing your objects is one of the most important still-life sketching steps. It will determine how your picture will appear and feel overall.
So take some time to experiment with different placements until you find a composition you like.
The Importance of Arranging Objects
Proper arrangement of objects is essential, and when arranging, keep the following in mind:
- Are the objects the focal point of the picture? If not, you may need to move them around until they are.
- Do the objects create a balanced composition – If not, you may need to rearrange them until they do.
- Does the arrangement lead the viewer’s eye around the picture? If not, you may need to move some things around.
- The use of negative space – Another thing to consider when arranging your objects is negative space. Negative space is the area around your objects which is empty. You can use it to create a more exciting composition or lead the viewer’s eye around the picture.
How to Arrange Objects for a Still-Life
Here are a few tips to help you get started:
- Start with the most prominent object and work down to the smallest one. It will create a more balanced composition.
- Stagger your objects – This will add visual interest to your picture.
- Group similar objects together – This will create a cohesive look for your drawing.
- Use negative space to your advantage – You can create more dynamic compositions or lead the viewer’s eye around the picture.
Tips for Arranging Objects in a Still-Life Art
- Experiment with different placements. Try out different types of arrangements until you find one you like.
- Play with the negative space – Use it to create more interesting compositions.
- Use perspective to your advantage. If you want to create a more complex composition, try using perspective to create depth in your picture.
- Include a variety of objects – This will add visual interest to your drawing.
- For more tips on arranging objects in still life, check out this tutorial: How to Arrange Objects in a Still Life Drawing.
Sketch your Composition
Sketching out your composition first is one of the finest ways to understand how your final drawing will look. It will assist you in trying out various places and configurations until you discover one you like.
You can also use it to decide on the picture’s focal point.
It’s also a good idea to create your drawing in sections.
How to Sketch Your Composition
Below find a few tips to help you get started:
- Sketch your composition lightly with a pencil on a piece of paper to get a general idea of the layout before you start drawing. This process will help you avoid making mistakes and make the creative process more accessible.
- Start by outlining the objects in your composition using light, sketchy strokes. Don’t worry about getting all the basic details right at this point.
- Once the basic outlines are in place, start with additional details you can see. Use a variety of pencil strokes to create different textures and effects.
- Experiment with basic drawing techniques and keep changing until you find the best. Still-life drawing is all about experimenting and finding what you’re comfortable with.
Shade in the Objects
Shading is an integral part of any still-life drawing. It can enhance the composition’s visual interest, the sense of depth, and reality.
You can use various shading techniques, so experiment until you find what works best. Some popular methods include hatching, crosshatching, stippling, and scumbling.
Don’t be afraid to use various shading techniques in your drawing – it will add more depth and complexity.
5 Tips for Filling Out Your Showing With Light and Shadows
Following these simple tips, you can create a more realistic and three-dimensional drawing using light and shadows.
1) Pay attention to light and the direction of light. It’s crucial to consider the direction of light and how it impacts the objects in your composition while sketching a still-life. Try to mimic how light naturally falls on the things in your scene.
2) Use a variety of pencil strokes. When shading an object, use a variety of pencil strokes to create different textures and effects.
3) Add shadows. Adding shadows to your drawing is one of the best ways to create a more realistic effect. Try to visualize the cast shadows created by the objects in your scene, then pencil them in accordingly.
4) Use contrasting values. To create a more dramatic effect, use contrasting values to highlight specific areas of your drawing. For instance, you might darken the shadowed areas and lighten those directly hit by the light.
5) Practice, practice, practice! Practice is the only way to improve shading and lighting. So don’t be afraid to experiment with different techniques and approaches until you find what works best.
You can produce spectacular light and shadow effects for your artwork with a little skill.
Add Details and Highlights
Details are the most important elements; without details, your picture will look flat, unfinished, and lifeless.
Adding details can be time-consuming, but it’s worth the effort.
Another critical element of an excellent still-life drawing is highlighted. Highlights help add contrast and visual interest to your composition.
To get various textures and effects, experiment with different pencil strokes. Experiment with different techniques and approaches until you find what works best. It would help if you experimented with different types of pencils as well.
Types of Details to Add to Your Drawing
You can add some final touches to your drawing to make it more engaging and realistic.
Here are a few instances:
- Texture: Adding texture to your drawing adds realism and visual interest. You can create different textures using pencil strokes, erasers, and blending stumps.
- Reflections: If your scene has a reflective surface, add its reflections to your drawing.
- Shadows: As mentioned earlier, shades are critical in any realistic drawing. Be sure to add shadows where they would naturally fall.
- Highlights: Highlights can make your drawing come alive. Use a variety of pencil strokes to create different effects and highlights that will catch the viewer’s eye.
When you add details to your drawing, you have infinite options. Experiment and have fun!
Adding Highlights to Your Drawing
Adding highlights is one best way to make your drawing more attractive and eye-catching. Highlights are areas that are hit directly by the light, and they can make your picture pop.
Utilizing contrasting values is an excellent way to add highlights.
For example, you might make the highlights lighter and the shadows darker.
It will make your drawing appear more dramatic and distinctive.
Contrasting Values
Values are the darkness or lightness of a color.
Using contrasting values, you can highlight specific areas of your drawing and make them stand out. It’s always an excellent way to add interest and visual appeal to your picture.
One way to create contrasting values is to use different types of pencils. You might use a brighter pencil for the highlights and for the shadows, a darker pencil.
You can also use different strokes to create other effects. Try drawing the highlights with a light touch and the shadows with a dark touch.
Adding Shadows to Your Drawing
As mentioned earlier, shadows are a critical element in any realistic drawing. Stunning shadows give your picture depth and dimension and help create the illusion of realism.
One way is to use the layering technique. It involves adding several layers of shadow to create a more realistic effect.
Another way to add shadows is to use contrasting values. You might make the highlighted parts lighter and the darkened areas darker to get a more dramatic impact.
Knowing the light’s direction is also crucial. Cash shadows will draw too much attention in the opposite direction of the light source.
Remember, the key to creating realistic shadows is to be consistent. Use the same pencil strokes and values throughout your picture to give a more unified look.
Finish up by Adding Any Final Touches
A crucial stage in the process is giving your drawing the final touches. The final step will help you achieve a more realistic and polished look.
To give your drawing some final touches, you can perform a variety of things. The addition of reflections, shadows, and highlights is one method.
You can also add textures and details. Pay attention to the minor details, as they can make a big difference.
Finally, use gum or an art eraser to erase stray pencil marks and mistakes. It’s essential to have a clean and polished final product.
Use A Fixative to Preserve Your Pencil Drawing
It’s important to use a fixative to shield your drawing once you’re done.
Your work will be preserved, and the colors won’t deteriorate thanks to the fixative.
There are a variety of different fixatives available on the market. Buy and use the one that’s best suited for your needs.
And that’s it! Congratulations on finishing your still-life drawing using a pencil!
Conclusion
If you’re searching for a new and interesting activity to occupy your time, consider trying your hand at still-life drawing.
With just a few simple elements and a little practice, you can create beautiful pieces that can become a masterpiece.
Please share this article with persons interested in trying their hand at this art form, and let us know how your drawings turn out!